Orion Nebula WITHOUT a Star Tracker or Telescope, Start to Finish, DSLR Astrophotography
Are you a photographer that has always
wanted to try astrophotography but you weren’t so sure about investing hundreds
or even thousands of dollars into a hobby before you knew if it was for you?
Well then watch this video because I’m gonna show you how you can capture and
process a photo of the Orion Nebula with the gear you might already have. For this
tutorial, I’m just gonna be using five pieces of gear a DSLR, a lens, a tripod, an
inexpensive intervalometer, and this last one is optional
this is a cheap baht Nov mask. Hey, if you’re new to my channel welcome my name
is Nico Carver. I’m a deep sky astrophotographer and my website is
nebulaphotos.com. With this channel, I just want to share my love of
astrophotography and especially help newcomers to the hobby get started. I
also just want to mention briefly here at the start that I do have a Patreon.
Thanks so much to everyone who already supports me.
It keeps the channel
going at a steady pace. If you’re interested, my Patreon starts at just one
dollar a month. Today I’m gonna show you how you can capture deep sky objects
meaning objects out in space that are outside of our solar system.
This tutorial will work for many different deep-sky objects. I’m going to
be shooting the constellation Orion which is set in the West right now
and we should be able to see after processing the Orion Nebula that the
Horsehead Nebula and the flame nebula and we’re gonna do it with just five
pieces of equipment a stock DSLR fast lens tripod an intervalometer and a bad
enough mask if you’ve seen my most popular video series it’s called Orion
Nebula start to finish this is going to be somewhat similar to that with a
a little bit of overlap but the technique and the processing will be different
since we’re not going to be using a tracker or a telescope as they did in
that video series for those new to asking photography what a star tracker does or
when they get a little bit bigger they’re called a mount an
astrophotography mount does is moves your camera at a constant rate
that rate is called the Sarah rate so it has a little motor in here with gears
and then it just moves everything on top called the payload at the city really
and that rate what it is is it’s the rate that the stars seem to move across
the sky from our vantage point here on earth and you can keep time to it just
like we normally keep time with the solar rate of course it’s not the
stars moving they’re so far away from us that they’re practically fixed it’s
really that the earth is rotating very fast around its axis called the
celestial Pole and that’s why the Stars are seeming to move across the sky so
another way to think of a star tracker or amount is the device to counteract
Earth’s rotation so Earth’s rotating this way the star tracker is going to
move oppositely at that satiereal rate and what that allows you
to do is take long exposures of the night sky and have sharp stars and bring
out those DSOs, deep sky objects through long exposure but they’ll remain nice
and sharp because you don’t get the motion blur from Earth’s rotation with
the star tracker but today we’re not going to use the star tracker or a
telescope because I want to show everyone out there that you can start
doing deep sky Astro photography with gear that’s more just common
photography gear you might already have at least a lot of it and I’m going
to repeat this a lot your gear does not have to be the same as mine to follow
along with this video as long as you have some kind of camera that can do
some you know manual exposure control you have some kind of lens
to be better if they can shoot f4 or faster on a tripod and you have some way of
taking many exposures without having to touch the camera each time then you have
everything you need for this tutorial first thing I’m going to do is I’m going
to talk about each piece of equipment to all be using tonight and we’ll start
with the tripod first thing, I’m going to say is if you already have a tripod use the
tripod you have for your first time trying extra photography there’s no need
to upgrade anything that you already have that being said the sturdier the
tripod the better I’m a big fan of Manfrotto tripod legs these are aluminum
Monferrato tripod legs that are probably 15 years old I’m sure that I bought it
used because I just trust in mine Frodo’s quality they held up well
all their stuff works well but the sturdiness comment and the the
reliability also goes for the tripod head you want to use the biggest
sturdiest tripod head you have and for me right now that’s this video head it’s
not designed for astrophotography but it’s just has a nice big platform for
holding the camera I know for a fact that when I lock down the tilt or the
a pan that stays in place and can hold a lot of weight so with the tripod
head bigger the better if it’s a ball head just make sure that it stays
stable okay next piece of equipment is the DSLR this
is an eight-year-old camera it’s my Canon 5d Mark 3 that I bought the year
it came out it’s a very nice full-frame camera but that doesn’t matter
just use whatever you have I repeated this several times now and the
the reason is I’ve often heard people remark well I’d like to do extra photography
but my gear isn’t good enough my camera is not good enough
it’s not true if you have a camera that can you can manually control the
the exposure you can do this one other handy aspect and we’re
going to be using in this tutorial is you want your camera to be able to
controlled with an intervalometer so almost any DSLR that you have will do
this is just you if you don’t already have one you might have to look up what kind
of intervalometer, you might want to get they look like this and what it is is it
allows you to take many shots so I’ve tried a bunch of different models I have
a fancy wireless one so the way the wireless one works is the controller is this thing and then it has a little
a receiver that goes on top of the camera and plugs in and then I can control it from
I don’t know something like 30 meters away or something like that it’s handy
but not necessary it’s a little bit more expensive to get a wireless one or a wired
one works just fine this is the newer model I think it’s about 30 bucks and
they all work the same way so just get whichever one is designed for
your camera is for people that are new to this device all it does is allows you
to trigger the shutter so normally we just hit the shutter button on top of
the camera but without touching the camera physically and the reason that we
want to do this is we’re taking a long exposure we don’t want to add any
vibration shake by touching the camera when we take that exposure so we can
just hit the shutter button right there to take the exposures but what an
intervalometer does in addition to just being able to take a single exposure
like that is to take a sequence of exposures so what the camera will do is
it will take hundreds of exposures in a row
and the way you do that all you have to do is a program in the sequence right here
and press Start so really easy I’m going to show you how to use it if you are
still, on the fence about buying one of these if you don’t already have one, it’s
about 30 bucks keep in mind that these are also super useful for time-lapse
photography but if you’re not in the time-lapse you’re also a real cheapskate
If you don’t want to spend the 30 bucks then what I’d recommend instead
‘s just a shutter release cable so it looks sort of like the intervalometer
except it’s smaller and all it has is the little external cable release these
go for as low as like 10 bucks so the downside to this of course is you can’t
a program that sequence so what you’re gonna have to do is just get out there
and sit in a chair next to your tripod and be careful not to move and just take
hundreds of exposures hitting the button each time manually okay so it’s another
option I don’t recommend it though Oh the last thing I’ll say about the intervalometer
is canon a bit weird they’ve never put an intervalometer into the actual
firmware of the camera to my knowledge maybe and some of their newer
cameras I haven’t followed it too closely so don’t quote me on that but a
a lot of camera manufacturers have been doing it for years and so read your
manual or google it because you may find out your camera already has a built-in
intervalometer so you don’t need to spend any money on this you can
just program it right in your camera and have it rip through a sequence of
exposures without you touching anything next up we have the lens and I’ll be
using this lens this is a lens that I bought for filmmaking it’s called the
Rokinon cinema 1.5 the optics are the same as the Rokinon 85 millimeter
f one point-four just so you’re aware again use whatever lens you have even if
that’s your kit lens that came with your camera use it if you do have a choice of
lenses though I would recommend a lens with a focal
length of at least let’s say 50 millimeters and one that can shoot
faster than f/4 so what I mean by faster is the number will be smaller because
remember focal ratio is a division so f2 is faster than f4 because the aperture
is bigger because one half is bigger than 1/4 right for
astrophotography you just want that focal ratio to be faster so you let
in more light, more signal with each exposure also astrophotography is a
the general rule of thumb is prime lenses like this one where they just have a fixed
focal length so this is just an 85-millimeter lens that will perform better than
zoom lenses where they have a range of focal lengths like a 70 to 200
millimeters however that’s just a rule of thumb because I know that every lens
is going to perform differently and some of the Canon L Series lenses which are
very expensive zooms do perform very well for astrophotography so just take
that with a grain of salt primes as a general rule of thumb will perform
better than zooms the last piece of gear I’ll mention and this one is optional
because I’m also going to show you how to focus without it is a Bahtinov mask
and what a Bahtinov mask is is it’s a manual focusing aid and the reason I
recommend it is stars are one of the trickiest things to nail focus on and we
have to do the focusing manually even if your lens has autofocus because
typically the camera’s firmware that controls the lens autofocus
the system doesn’t work on the stars because it just isn’t trained to do that and
there’s just not enough light typically for it to do it well so the Bahtinov
a mask is a tool for accurately manually focusing
on a bright star and it is especially with a lens that the star has to
be bright like one of the few brightest stars in the night sky for
this to work at all the good news though this is cheap this is I believe about
ten dollars from Amazon it’s just plastic it’s not going to hold up
forever but it works okay when if you are interested in buying one I’ll put
the links in my description and the way that you’re gonna choose one are a measure
the diameter of your lens shade here and then just make sure that that falls
within the range listed for that bottom of mask and then it has these little
adjuster pins so that it will just fit and be centered right on your lens like
that for people that are watching this that maybe have been doing Astro
photography for a while and are interested I do have much better Bahtinov
mask for lens-based systems this is called the lonely speck sharp star – and
this is the 100-millimeter edition but I only recommend investing in
something like this if you’re serious about Astrophotography and
specifically, lens-based Astro photography and you have several
different lenses you want to use it on otherwise I just think it’s a little bit
too expensive especially if you don’t already have a filter holder system to
invest in a nice bottom mask like this the reason that it does work
better is I don’t know if you can see that but the pattern is very fine on
this it’s printed right on this piece of plexiglass if you compare that
to this one you can see that the pattern is much coarser on this one and what
that means that this one is a lot more precise when using lower focal
lengths and that’s it for gear there are a few
things you’re gonna want to plan out though before leaving the house so let’s
go over them the first thing and this is something that I often forget to do
until the last minute when it’s too late to charge your camera battery
you need to do this probably an hour too ahead of time so there has time
to charge and you might want to start in the morning because if you have
extra batteries you want to make sure that those extra batteries are charged –
the last thing you want is to get out there your battery’s dead and you just
we’re done for the night until you can charge up all right the next preparatory
step we’re gonna take is we’re going to figure out where we’re going to shoot
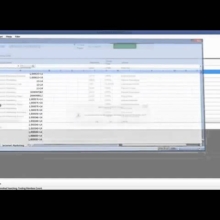
and so for this, I’ve pulled up light pollution map info and over here on the
right-hand side there are different overlays and I’m just going to use the
the latest information here from 2019 in general I wouldn’t trust this completely
but it’s a good start at least I find that it’s a little bit optimistic
especially this verse survey if we switch over to the World Atlas survey
you can see that’s a lot more pessimistic and it’s probably a little
a bit more accurate actually but then it’s not quite as detailed as these later
helpful surveys – so anyways I live right here in Somerville
Massachusetts and you can see that’s in a really bad place for light pollution
it’s quite evident if you just step outside in look at the night sky
because only the 10 to 15 brightest stars are even visible I can see you
know Polaris and but I can’t see many of the other stars in a Little Dipper for
instance so that gives you an idea of how bad the light pollution is
but I’m a member of an astronomy club and the astronomy club has an observing
field and clubhouse up here sort of near this Westford Chelmsford area so it’s al
it’s quite a bit better skies up there a few magnitudes better really and so
this is where I’m going to go to take the shots for this experiment we’re
doing in this video if you have a local astronomy club I would recommend talking
to them consider joining you might not even have to join just to find out where
some good spots are in your area where you can do some astrophotography you can
also just google around and and and try to find this information online but this
The light pollution map also gives you just a general idea of another idea I have for
you are you can look for parks especially some state parks that might have
some like open parking areas that you could pull off the road and set up
at night you don’t want to get trapped in a park of course so just be careful
out there make sure that you’re not getting locked in or something like that
that’s happened to me a couple of times but usually, it works out okay so yeah the
the idea here is to look for a place that is not one of these brighter hot colors the
red orange and yellow but one of these cooler colors the green and blues and
blacks are the ideal place if we just zoom out and look at the whole US
here you can see I’m I’ve lived for the past dozen years or so along the eastern
seaboard which is one of the worst places in terms of light pollution in
In the US when you go out here to the west it’s much easier to find a dark
the site is nothing that over here on the eastern seaboard is except
if you go up to Maine maybe or down to West Virginia is going to be nearly as
dark because even when you escape the really bad light pollution you still
have a huge light dome whenever you point your camera from
where I am to the south of the East from Boston the city of Boston so even if
you can get out a little bit you have to get out quite far to
escape light pollution if you live in a big city but the point is just
try the best you can to get to a darker site because that’s gonna make
your photo is much better and much easier to process okay the next thing this is
gonna get a little bit technical but I think you can handle it we have to
figure out the proper exposure length if you’re coming from the photography world
this you’ll know this is shutter speed but in astrophotography, since we’re
typically dealing with long exposures we don’t usually call it shutter speed we
call it just exposure length or sub-exposure length and let me explain what
sub exposure means or sub for short you can think of our final processed image
as the total exposure is often called the total integration and it’s a
combination of many shorter sub-exposures because what we’re gonna do is
we’re gonna stack many sub-exposures together to reduce overall noise in the
a picture so what we’re trying to calculate right now is the
length of each sub exposure and there are two factors to keep in mind one we want
to expose as long as possible on each sub-exposure to get as much signal
hitting the sensor in each sub-exposure but two we want to have round stars and
the Earth’s rotation is what makes that difficult that’s why we might invest in
a star tracker to counteract that but we’re not going to use a star tracker so
we have to figure out how long we can expose for before
the Earth’s rotation turns our little round stars into eggs or lines or arcs
or whatever they’re gonna be we want those stars to be round not
misshapen and finding out that exposure time for round stars you can just do it
with trial and error so we can get out under the night sky we can start let’s
say at one second take a picture look at it okay we got round stars to let’s go to
two seconds take a picture look at it yep looks good
three seconds take a picture look at it up now they’re no longer around stars I
think our maximum exposure time then is gonna be two seconds so that’s one way
of doing it trial and error if you’re happy with that go for that and you can
skip over the next ten minutes of this video because the next 10 minutes I’m
going to talk about formulas for trying to figure out your optimal sub exposure
time the most famous formula is called the rule of five hundred I have a whole
video comparing that to the rule we’re going to use I’m not going to
go into it but we’re not going to use the rule 500 it’s not that great if
you’re planning to stack your exposures because we’re stacking we want
round stars and so instead we’re going to use the NPF formula there are two
places you can access the NPF formula one is free and the other one is in a
a paid app so let’s first look at the free one on the website
of the société do Habra where the original developer of the formula
Frederic Michaud has a nice calculator all this is mentioned briefly here the
another method is the photo pills app and that app cost $10 so I’d only really
recommend buying an app if you know that you’re really in desk photography but
I’m going to show you how to use both tools right now because maybe some of
you might already have the photo pills app and but
never used the NPF formula in photo pills we’re gonna start here with
Frederick’s web calculator is okay looking at the website here if you do read
French, then you can use it in the original French but if you don’t then
I’d recommend using Google Chrome because built into the Google Chrome browser
is the Google Translate so if I go up to the address bar in the upper right
here’s the translate button and I can click translate this page and choose
English and it does its best job to translate from French to the
English so that should help a bit understand the rule and learn something
from the page, I’m not going to go through this all because I want you to
read this on your own one thing that’s a little confusing is it
changes from the NPF rule to the MFN rule not sure why anyways we just go
through here and all the things that we need to fill out are highlighted in this
blue and then when we’re done filling that out the results will be down here
in the yellow so we start with picking our camera brand and then pick the model so I’m using the 5d Mark 3 today then
we’re gonna put in the information about the lens so I’m just going to use the
An example of the lens that we’ve been talking about is the nifty 50 so
it’s 50-millimeter focal length and an aperture of 4 is what I’m gonna use then
this is nice that you don’t have to know the declination of your object
you can just tell it which direction you’re shooting so I’m going to choose
southeast I’m going to choose my latitude of my location here which is
about 42 degrees and my target location is about 40 degrees above the horizon if
If you don’t know these things ahead of time you can look them up in Stellarium
or one of the many planetarium apps last thing to choose here is whether we’re
going to shoot it horizontally or vertically and
we just click calculate the exposure time button and all of the information
is down here in the yellow box and we can see with a rule 500 we would have 10
the second agrees with what we’ve been talking about with a simplified MPF rule
we have six and a half seconds we could round that down to six and with the
complex NPF rule we have some difference here across the sensor but basically
three seconds we’re gonna round down to three if you keep scrolling down in this
the page explains exactly how he calculated the NPF rule and how he came
to the formula and it explains it very well so I would recommend
reading that all again the author is Frederique Mashhad and I like
that he took the time to put this together and figure out this formula so
I hope other people find it as useful as I did so another way to calculate both
the MPF rule and the rule of 500 are with an app I found called photo pills I’ve
had this app for a while but didn’t realize it did all of this you
can get this app from the App Store it’s available both on Android and iOS
devices and it’s currently $9.99 on either App Store so it’s a little bit
expensive for an app but it does a lot more than just help you calculate
exposure time it also has a virtual AR planetarium and all these different cool
features built-in for planning your astrophotography so right here on the
home screen for photo pills if I scroll down a little bit one of the tools is
called spot stars so I’m just going to click on that it has a camera database
so I’m going to search for my camera I’ve already chosen the candidate 5d
Mark 3 but I’m just gonna choose it again here we’re gonna put in the focal
length of the lens so I’m just gonna use 50 millimeters again the aperture I’m
gonna use a 4 for the declination of the object and it
also has an AR mode which is pretty cool it puts a planetarium on top of your
camera and then you can just find the object you’re looking for the night
sky and set it that way then the last thing is it says default or accurate and
what this is is the default is the simplified MPF rule and the accuracy is
the full complex NPF rule I’ve looked at this app across many different focal
lengths and apertures the declinations and all of that and these results for
both the complex and simple VF roll do match up with Frederick Michaud’s
website so I feel that you can use photo pills instead of the website it’s very
handy to have this sort of mobile app when you’re out in the field for
calculating and PF rule and not having to do all that math and then you can
also compare it right below to the rule of five hundred okay now that we know
our correct exposure time for each sub exposure let’s look at some of the other
camera settings we’ll want to set before going out okay we’re gonna look at some
other camera settings here of course this is a canon camera so the men user
might be a little bit different if you’re using a different brand but
hopefully, a lot of this will carry over I’m gonna go ahead and turn it on and
the first thing that we can do is we can go ahead and set the exposure or shutter
speed to what we figured out in the NPF formula so for the 85-millimeter lens
I’m using at f/4 with this camera and the Ryan Nebula right now that’s two
seconds I’m gonna use an ISO of 800 I would
recommend using somewhere around 800 to 1600 especially if you have a canon
camera this seems to be sort of the sweet spot for Canon cameras but it’s a
good sort of starting place for any kind of DSLR really okay next thing we’re
gonna go into the menus and start with the first option here in the first
the menu image quality we can go ahead and turn the JPEG option off and we want
just regular full-size raw image so if your camera has the raw capability
just use raw no reason to use JPEG if your camera only shoots JPEGs
then use JPEG but use the highest quality JPEG that it offers but if it
does have raw use raw because you’re going to get better quality images that
way okay for image review I’m going to go ahead and turn that off the reason
being and this is sort of important we don’t want to have the monitor actually
active at all when we’re shooting after photography there are several problems
that can happen when you have the monitor or LCD active including IRR
leaks and just heating the sensor in general so go ahead and turn the image
review off I’m also going to turn the beep off I like to just turn off any
sounds that are going on mirror lock-up is not a bad idea for this but
I’m not going to talk about it just because this is a beginner tutorial and
I’d rather keep it simple I’m not going to go through every option here
for white balance, I usually just put it on daylight
it doesn’t matter though if you’re shooting raw but if you’re
shooting JPEG I’d recommend daylight white balance
colorspace again probably doesn’t matter but I’m just gonna leave it on Adobe RGB picture style does not matter unless you
are shooting JPEG only if you’re shooting JPEG only I would recommend
faithful or whichever picture style just says zero zero zero zero so it’s not
adding any sharpening or any effects to the JPEG okay next up here we have long
exposure noise reduction that sounds good but we’re gonna do an actual manual
calibration so we don’t need it and we don’t want it so we’re gonna go
ahead and disable long exposure noise reduction
the same thing with high ISO speed noise reduction go ahead and disable that too
basically from this point on I just sort of them going through and disabling
things we want as a raw and output from our camera as possible so usually that
means disable disabling a lot of the neat tricks that your DSLR is supposed
to be able to do let’s see we do know these matter I’m going to enable
exposure simulation I believe what that’s gonna do is make
the picture is a little bit brighter on the LCD which is something we would want autofocus does not matter I don’t think
anything else in here matters I’ll just mention you can always format
your card in the camera to have a fresh slate so you have plenty of room on your
SD card that’s another pitfall sometimes people run into is they don’t have
enough room on their SD card so I’d recommend just backing everything up
before you start and then format in camera oh and I should actually
mention right above that right here we have auto-rotate I have heard that
sometimes this can mess people up even with raw pictures so I would recommend
turning any kind of auto-rotate off I have my auto power offset to disabled
that’s a personal preference you might be more comfortable with it being set to
eight minutes or something like that auto power off is only going to happen
when you’re not taking pictures but I just find it annoying whenever
the camera how-to powers off so I have it disabled on my camera it’s up to you
if your camera has LCD brightness I would recommend turning that all the way
up so that you can see what you are working on because everything you’re
going to be shooting is going to be sort of dim so having a high LCD brightness
is helpful but I’ll just mention that you might also want to turn this down
because if you are doing like photography with a telescope you might
want to know that you can turn this way down and save your night
vision a little bit but for astrophotography, I’m going to turn it up while we’re waiting for the Sun to go
down let’s talk about calibration frames so I would highly recommend if you’re
following this tutorial to take calibration frames they’re going to make
your picture is much better and easier to post-process what a calibration frame is
is it something that alters the raw picture in a way to either remove noise
or to correct optical issues and so there are three types we’re going to
talk about bias frames dark frames and flat frames let’s start with bias frames
I think they’re the easiest to understand with bias frames it does not
matter when you take them or what temperature the camera is at all you
just want to do is just put it on manual exposure setting and just keep going all
the way over until you’re at your shortest exposure that the camera can do
on my camera that is one eight thousandths of a second so the shortest
possible exposure on other cameras that might be 1/4 thousandths of a second or
something like that and you want to set your ISO to whatever you had it for your
subs often or also called your lights your light frames so for my camera I set
that to ISO 800 for yours 800 1600 400 whatever it is just make sure it’s the
same as what you were using when you took your pictures of the night sky and
then we’re just going to set up our intervalometer to take let’s say 50 bias
frames and we just let it go and it takes 50 of these very short exposures
with the body cap on and I would also want to get away from
these lights are just in case there was any light leak because you want to do this
in complete darkness, you don’t want any light hitting the sensor because what
the bias frames are doing is they are just looking at the pattern noise that
the sensor produces so just the inherent noise of the electronics on the sensor
that’s what we’re trying to take in the bias frames and then we’ll subtract that
out in our processing with deep-sky stacker or pix insider whether or Astro
pixel process or whatever that you use the next up is dark frames they’re
similar to bias frames and that we do them in the dark with just the body cap
on or with the lens cap on the lens but they’re going we want them to match the
the exposure time of our light frames so we’ve determined using the NPF formula
that we’re going to be taking two-second exposures I’m going to be using ISO 800
and so I just set that up on my camera this is should be the same
settings that we use when we take pictures of the night sky called
our light frames and again just take at least 30 I’d say if you have the disk
space you can take 50 but 30 is probably enough just set it up on your
intervalometer set the end of the number to 30 and just let it go taking a bunch of
two-second exposures in the dark that dark well one last thing about
darks unlike bias frames it’s important that your dark frames also match the
the temperature of your light frames as closely as possible so what I would
recommend is get out there early and let the Sun set when it’s completely dark and
you’ve let your camera adjust to the outside temperature take your dark
frames then it’s gonna get even darker because
even when it looks dark to you the night sky will get a little bit darker over
the next half hour to an hour and you now have your dark frames done then why
then start focusing lining up your camera with Orion and start taking your
shots of the nebula or whatever deep sky object you are shooting okay the last
type of exposure we need the actual lens and we need it to be at the same
focal point and aperture as when we shot the lights so what I would recommend is
if you can bring something out into the field to take your flats if not just be
very careful when bringing it into the house that you’re not messing with the
lens at all what the flat frames do is they will take care of vignette emit
especially with a lens-based system and then also if you have any little bits a
dust or anything on your lens or your sensor they’ll also take care of that
and what we need for a flat is we just need a nice as the name suggests flat
white surface to take a picture of so there are a lot of different methods for
doing this you can try using Scott this the sky as a flat I haven’t had that
much luck with that since the sky brightness fluctuates a lot I’ve had
people you know just take a picture of a white wall with some even lighting on it
what I usually do is I have like a LED tracing pad but you can also use an iPad
or a computer screen and just put that flat up against the lens shade so that
you know that it’s completely flat up against the lens shade and then just
take pictures of that the one drawback of doing it with an LED
tracing panel is sometimes you get into the problem of you have such a short
the exposure that you get into the sampling rate of the power source
they’re not explaining this better but you see these lines and your flats
so if that happens you just need to take a slightly longer flat frame or diffuse
and but sometimes to take that longer flat frame you’re gonna have to diffuse
what you’re shooting a little bit so just put pieces of paper between the LED
tracing panel or the iPad and the front of the lens shade here and that should
diffuse it enough that you can then take your flats how do you know how long to
expose flat for though this is where it’s helpful to use the histogram on
your camera if you know where that is so basically just bring up the histogram
the feature you should see a little bump that’s all of the information in the
picture all the pixel values and just bring that bump halfway over on your
the histogram on your camera and that’s a properly exposed flat it doesn’t
necessarily have to be all the way halfway over if it’s between 1/4 1/3 or
halfway over as long as you don’t have it like way over on the right side or
way over on the left side, it’ll probably work but halfway over is a good rule of
thumb for a properly exposed flat frame and how many to take just like with your
darks I would take somewhere over 30 50 would be probably better but it’s not
necessary so at least about 30 flat frames once you know by trial and error
where your flat frame is based on the histogram the exposure value then you
can just program it with the intervalometer and
and then take 30 to 50 flat flames okay hopefully that all made sense so we
again have the bias frames those are the ones that are as short as possible
within the dark with either the lens cap on or the body cap on the camera we have
the darks which have to be matched in both temperature and time to our light
frames are our subs and then we have our flat frames and this is where we need
some kind of flat source of light and this can be like an iPad or LED panel or
a wall or whatever you have we just want to make sure that it’s perfectly square
with the camera and the flat frames, we’re going to expose it so that the back
of the camera histogram is about halfway over and again will take 30 to 50 of
those I’ll just finish up this section by saying calibration frames are
important I know a lot of people are going to want to skip them because they
sound difficult or tedious or whatever it is they’re a good idea to do
though and get in the habit of doing for all kinds of deep skies to photography all right now night and I’m all set up
here I’ve brought out a table this is
optional of course but I like to just have a table so that I can have some
things already so I’m an intervalometer ready there’s my bottom off mask I have
a little headlamp here and then I’m going to be doing some other things
later in the night so I have a bunch of other gear here but what I’m also using
this for right now is just as a way to sort of block some lamp street lights
and house lights over there from getting into my shop so if we get down to the
level of the camera this thing is blocking those lights but right above
that is Orion we’ll just go through the different steps we’re gonna start with
focusing or not we’re going to start with finding Orion then we’re gonna
focus on a bright star and then set up the intervalometer and then take our
shots and that’s the only other thing we have to do during the
the night is after a few hundred shots we’ll adjust and recenter Orion in the
viewfinder alright let’s go alright the first thing we’re gonna do
we’re going to find the rhein constellation and like I said earlier
we’re not going to be using a finder because with an 85-millimeter lens it
should be easy enough to just find the Orion constellation with the live view I do
have the live view set to ISO 8030 ii exposures just to trick the exposure
simulation into giving me a nice bright view this might not be necessary on all
cameras but on my 5d I’ve noticed it works ok so now I’m just going to loosen
the tilts and the pan on the tripod here I’m gonna start moving the camera around
a little bit and you can see I’ve already sort of lined it up with where I
see Orion in the sky so all I have to do is just sort of tilt up here
and there it is Oh Ryan is one of the easiest constellations I think to find
in your live view because that Orion belt is so bright that it’s really easy
to see we keep going up here there’s a Betelgeuse there’s Orion’s bow and arm
and there’s the belt if I wanted to Center the Orion Nebula it’d be right
there in the sheath but what I’m gonna Center first is Rigel which is this
the lower star at the bottom here and it’s the brightest star in the constellation
which is why I want to use it for focusing because with a lens you really
need a bright star to focus if you’re using a bad knob mass like we are going
to hear especially a badenov mask is not designed for this focal length so
we’ll see how well this works again if it doesn’t work we’ll go to my backup
which is the sharp star system okay let me go ahead and zoom in I’m just going
to press the Zoom button to adjust towards pointed get Rigel centered there and
then press the Zoom button again to get it ten times zoomed and if you don’t
have any kind of Baden oov mask you can still just focus with a live view of the way
to do it is just grab your focus ring and push it in one direction you’ll see the
star gets bigger that’s infinity in quotes
because it’s not working so you can see then as I start twisting the
focus ring it gets smaller and then it starts getting bigger again so you just
want to find that place in the focus ring where the star is smallest so
I’m gonna go down again it gets right about there what you can
do to test is now take a picture I’m you know I don’t want ISO 8030 seconds
because that would be completely blown out so let me adjust these here first
I’m gonna adjust the ISO down to 800 and then I’ll adjust the exposure down to
let’s try 2 seconds I think that’s what we thought
all right exposure time would be okay I’m gonna take an exposure okay and then
I’m gonna go to playback and I’m gonna zoom in as far as I can and just look at
those stars and what we’re looking for is do the little faint small stars look
fairly pinpoint or do they look sort of blurry and looking at Orion Nebula there
you can see we have some hot pixels and noise but we also have some stars here I
think there’s a little bit of motion blur from my using the shutter button
rather than a remote timer so let’s try that again this time I’m going to set
the camera is on oops wrong button timer mode let’s do a two-second timer okay let’s zoom in again that looks pretty good though what I
would recommend if you have some time to just adjust just try it
sort of try different focus points until you see that it looks the best so I’m
gonna zoom in again I’m gonna try focusing it again and I’m gonna take another exposure okay
I’m going to go back to playback mode zoom in and then I’m going to compare
between this exposure and the last one and I think you can see here that this
one is much better and so I know that I’m on the right track here when the
stars are smaller and I’m seeing more faint stars in the picture so for
instance here’s the new exposure with the new focus point here’s the last one
they can see more faint stars and those stars are smaller points so with trial
and error you can get good focus without a Bahtinov mask but it’s just much
easier with one so let’s move on now to using one and I’m going to start with my
cheap one here all right it’s in there so now I mean a zoom in and this might
be a little bit harder to see but we have this little line now that’s coming
out from the star core and if I move the focus back and forth you can see that
line move as well and what I’m going for is to try to get that line right in the
middle I think that looks pretty good could
help to have a magnifying glass if you have one push that right up to the right
up to the live view and you might be able to see a little bit more but let’s
try this okay I’m going to go back to playback mode take up now to playback
mode sorry and I left the bottom of masks in just
to show you what we can see there it still looks sort of just like a central
spike I’m not seeing the X pattern so I’m gonna try a slightly
longer exposure and see if we can get that X pattern to appear ok still no
expander oh maybe I can see it slightly yeah actually I can sort of see
it there really faint but it is there and I can see that this is a good focus
and I’m gonna take the Bahtinov mask off and take another exposure I’m going
to put it back down to two seconds, okay and this looks very good to me so I
think that the Bahtinov mask did help get a very good focus I can see a lot of
small stars so now that we’re focused the next step is to set up the
intervalometer okay the first set in the intervalometer is a delay so that’s
how long it would delay before taking the first shot I’m just going to set
that to two seconds the next setting is long so that’s how long each exposure
should be and we already found out using the MPF method that this should be two
seconds so each exposure will be two seconds set that the next setting is
interval and so this is how long it should wait between each exposure since
I’m just going to assume we’re not going to use mirror lock-up it might be a good
the idea that I don’t have it set up right now I’m gonna go ahead and do a
the two-second interval between each shot will just give the camera some time
to settle between each exposure so we’re doing a two-second to long
exposure and then a two-second interval and then n stands for a number so the
number of shots we want to take and I’m going to set that to this is sort of annoying you just have
to keep pressing it on this one okay I’m gonna said that to two hundred since
we’re doing untracked astrophotography we’re gonna have to move the camera as
Orion drifts out of the field due to the Earth’s rotation so 200 I think is a
safe bet before we want to adjust the camera a little bit the last sitting on
this intervalometer is done you want to make a sound when it takes shots and I’m
gonna say no I don’t want it to make any sounds okay so now that we have
everything is set with an intervalometer all we have to do is just have it hooked up
to the camera and press the start button sometimes this will be a play button to
start the process all right we’ll let it do its thing and then look at what we
get all right as you can see after a couple of hundred shots or Ryan is no
longer centered so all we have to do it’s just
recenter Orion like that and then run the intervalometer again before we do
though I would recommend Howie’s whenever you start a new run let’s just
refocus so I’m just going to Center Rigel back up there look put my bottom of mask back on zoom in on that guy and try focusing
again here I’m gonna take a four-second shot just
so that it can see that a little bit easier okay that looks pretty good okay so you have to remember when you’re
focusing take that button of mask back off before you start your next sequence
but now we’re ready to go so I’m just gonna hook the intervalometer back up
and let it rip for another two hundred exposures one other thing I should note
I remembered to do before you start your intervalometer is to turn off your
live view because if that live view is on sometimes it will stay on and that
will heat the sensor giving you more hot pixels and it also drains the battery
a lot faster alright we’ll take another couple hundred and then we should be
done for the night okay after you’ve taken a few sets of two hundred
exposures each time moving the camera over a little bit centered Orion you can
call it a night I’m gonna stop now but when
you think about it when you’re just taking two-second exposures that don’t
make a very long integration something like fifteen minutes total so if you
want to keep going and you want to take you to know thousands of exposures to
combine that would be even better on you’ll be able to get more out
of it that way and be able to reduce the noise further but in the interest of
this just being in the demonstration I’m going to stop at a few hundred but I
encourage you to go as long as you feel like you have the sanity and dis space
and time to do so next up what we’re going to do is we’re going to take what
we’ve shot tonight and look at it on the computer and then get into calibrating
registering stacking and post-processing so all the fun stuff if you’re following along
you can download these from Google Drive and just follow along with my example
files here or if you’re doing it on your own I would recommend organizing your
files into these four folders you have them all ready to go for the next step
here which is we’re going to use a deep sky stacker to calibrate the lights with
the flats darks and bias files and then we’re going to register those lights
which means matching them based on the star patterns so that they’re all lined up
and then stack them into one complete image that has all of that data combined
together and it rejects a lot of the noise both through calibration and just
through the process of stacking the images together, we can reject a lot of
things like hot pixels and just the inherent noise of the sky and
uncertainty of light so we’re ready to go here let’s go ahead and open up deep
sky stacker which is this right here I’m using the 64-bit version it does tell me
a newer version is available for download I’m using 4.1.1 and this says
four point two point three is available I’m not going to upgrade right now but I
think it works the same way we start over here on the left-hand side with and
we just basically step through these different steps we start with open
picture files and I’m going to navigate to that folder I’ve shown you before
Orion 85 millimeter and I’m gonna start by loading in my lights I’m gonna press
ctrl-a to select them all and click open okay now those are all loaded I’m going
to go ahead and check all of those just to see how many we have here we have 451
lights I’m now going to go up here back up to
where it says registering and stacking and choose dark files go into my darks
folder here again click once and then press ctrl-a to select them all and then
click open okay we loaded in 31 dark frames I’m gonna click on flat files load in my flats control to select all
click open load it in 20 flats I don’t have any dark flats this time I’m going
to use a bias so click on thighs files open up my bias folder press ctrl-a to
select everything and click open and we load it in 60 bias frames ok so we now
have everything we need here lights darks flats and bias the next thing I’m
going to do is I’m going to click on this register checked pictures link
right here we can see here there’s an actions tab and an Advanced tab it says
dark flats and bias checked that’s good I’m gonna leave automatic detection of
hot pixels checked I’m going to go to the Advanced tab and I’m going to
compute the number of detected stars here okay it found 200 stars with a 20% star
detection threshold that seems fine if I wanted to I could try raising that and
then just try clicking that computes button again to see what happens okay
when I raise the star detection threshold the number of stars goes down
if I lower that star detection threshold like let’s say to try 15% we get a few more stars this is probably
fine I’m gonna leave that at 15% I’m going to click into recommended settings
and just see what we have here it’s saying that we’re using Sigma clipping
combination method and sigma clipping median for the other calibration frames
that all seems fine basically if this recommended settings thing found any
problems instead of showing in green it might show things in red to fix certain
things would this all looks good we can click on stacking parameters here and
just see what it’s doing so it’s doing a median Kappa Sigma clipping you can
hover over these different stacking modes to find out what they do this all
looks fine I’m gonna click OK and I’m gonna click OK again and it will start
creating all of our master calibration frames it starts with the bias and then goes
on to creating the master flats in the master dark and everything else and then
it will go ahead and calibrate everything and register those check
pictures together once we have all that done we can pick the best light frame to
use for the final registration and stacking and then stack all these
pictures together so I’m gonna let this go for a while here and check back in
when it’s done ok it’s now done I’m going to go ahead and sort these by
score and you can see the top score here is 1862 so that means that this has been when the deep-sky stacker looked at all the
different lights it found that this one had the
roundest and tightest stars in terms of focus so I’m going to go ahead and
choose that one as the reference frame I’m going to right-click on it and
choose use his reference frame we now get this little asterisk right there I’m
then gonna go over here to stack checked pictures which are the next thing down and it looks like I didn’t take my bias
frames it is the same ISO as my darks and flats and lights that’s not good but
oh well it’s too late now probably work out fine you can see the total exposure
here are about 15 minutes because we took 450 frames at two seconds each at ISO
1600 I don’t want a custom rectangle what is that just one standard mode I don’t
know what I did there I’m I there’s an option to stack based on a custom
rectangle and I must have somehow messed up and put that in so you always want to
check all these things and make sure that it’s what you want I just want
a standard mode where it’s framed by they’re based on the reference light
the frame which we just set I’ll use Kappa Sigma clipping that’s
fine all these other things are fine to let’s click OK I’m just gonna click on
recommended settings and just check through here looks good ok one thing to
keep in mind when stacking a lot of DSLR frames like this 450 that it can
temporarily use up a lot of space on your main hard drive this is just
because it uses a temp folder while it’s doing his work so you can see that this
is going to use sixty-two gigabytes of my 80 gigabytes free on the C Drive so
that’s just something to keep in mind you might need a fairly large amount of
free space to stack a lot of frames at once like we’re doing here but
I seem to have it now so let’s go ahead and click OK and let it do its thing of
stacking these all together okay it’s done stacking doesn’t look like much
here but that’s because it’s not stretched here so we’re just
seeing the bright blown-out parts but we can see Orion’s belt there and things
like that but we’re going to do the stretching in other programs so all we
have to do now is make sure that it saved the autosave dot TIFF which if I
look in my lights folder here scroll to the bottom there it is
autosave dot TIFF that’s all we need so we’re gonna use that in the
next steps and move on to the actual post-processing programs because this
was just what we call pre-processing so it’s calibrating registering and
stacking and then we’ll do the fun part right now okay so we’re finished with deep sky
stacker we’re going to go ahead and move on into Photoshop here I’m gonna go to
file open and I’m going to open that autosave dot
TIFF file that we generated out of a deep sky stacker first thing I’ll point out
here if we go up to image mode we can see that this is a 32-bit image
eventually, we’re gonna want to bring it down to 16 bits per channel but for this
the initial stretch we can leave it in 32 bits but several features you can
see are grayed out here and part of the reason for that is because this is a
32-bit image and not all features in Photoshop will work with a 32-bit image
but once we change it to 16-bit then most of them well so the first thing I’m going to do is
I’m going to duplicate the background layer and you can do that by either
pressing command J on a Mac or ctrl J on a window windows machine or if you don’t
like keyboard shortcuts you can right-click and choose duplicate layer
two and I’m gonna call this first stretch okay and then we’re gonna start
stretching the image right now it’s in what we call a linear state meaning we
haven’t taken the curve and flatten flattened it out into a
nonlinear State if we look at a histogram right now just open up a
histogram here oh it’s not working because we’re in 32 bits okay it never
mind let’s go ahead and stretch this up so I’m going to go to image adjustments
levels or I can press command l and okay well here’s our histogram so we can see
that this spike of information is over here on the left-hand side
and what we’re gonna try to do is bring it over to the right while also
spreading it out so the way we’re going to do this is going to take the middle
slider and push it over a bit press okay and you can see we’ve already taken that
spike of information here this is all the pixels and so you can see you’ve already taken this
spike this is all the information in the image and moved it
off from this left-hand side which is the shadows and we’re gonna do that
again getting a little bit further off the left-hand side and don’t worry that
the image is looking gray at this point we’re going to fix all that and
press command L again this time I’m gonna take this as a shadow slider the one
on the left and I’m gonna bring that over a little bit this is resetting the
black point now we don’t want to do it just by look because if we do that we’re
going to start clipping information and we don’t want to clip meaning
permanently bring any pixels down to a zero level yet so I’m just going to
bring it over here right on the left of the histogram but not going
into it and then I’m also going to take the middle slider and bring it over
again we’re going to do that a few more times you can see this time in addition
to moving the histogram bump over it’s also spreading it out which is what we
want we want to spread this out right in this area between the shadow and the
mid-tone slider so I’m going to take this over again and that time I just reset the black
level but this time I’ll take this over and I’m just gonna reset this one more
time okay so it still looks a bit weird but that’s okay this is just our first
stretch as I said if I zoom in now though what’s cool is we can already see
there’s a lot of cool detail here there’s there Ryan Nebula and you can
see the outer lower rim of it there’s the Running Man Nebula you
can just make out the horse head and flame there too so things are not
looking too bad the next thing I want to do though is I’m gonna go ahead and turn
this into a 16-bit image so I’m going to go to image mode and switch it to 16
bits per channel and I’m gonna say don’t merge okay now I’m gonna duplicate this first
stretch layer just by pressing command J I’m gonna rename it and call it
background prep is okay I’m going to select all by pressing command a or control a
on Windows, I’m gonna press command C to copy that layer and then I’m going to
press command N or I can go to file new and it will copy over the size of the
layer from the clipboard so I don’t have to change anything there I want to make
sure that I’m working in 16bits and I’m gonna call this BG for the background then
I’m gonna go ahead and paste it to my clipboard just by pressing command V or
control V on Windows and I’m gonna go ahead and start working on this for some
B’s go ahead and delete this background layer okay I’m gonna start basically
using the dust and scratches filter to get rid of everything but this gradient
in the background which we’re then going to subtract from over here so that we
don’t get this distracting light pollution in the shot okay so let’s go
ahead and go to filter noise dust and scratches filter noise dust and
scratches and I’m going to use a slightly bigger radius maybe something like 60 and using a 60-pixel radius on Dustin
scratches mean any feature that is smaller than 60 pixels will just be
filtered out so we still have these big star halos Rigel and the belt stars and
we still have our Ryan there so to take those out I’m just gonna use a Spot
Healing Brush so if you go over here or you press a J and your keyboard you
should get the Spot Healing Brush and then I’m just going to click over
those little spots that are left to get rid of those and maybe I’ll just follow up with a
a little bit of clone stamp here the way the clone stamp works is you just press
alt or option set a sample so I’m going to set this sample to the left here and
then I’m just going to and now I don’t like that maybe I’ll just use
this Spot Healing Brush a little bit more but turn down the hardness a little
bit okay I think that improved it a little
but we’re just going for a smoother gradient in here as we can get
without any hot spots, we do have some weird stuff going on in the corners here
but I suspect we’re gonna crop those out anyways this is looking pretty good
so I’m gonna go ahead and just save it to my desktop is the
background and after that saves I’m gonna go ahead and save my main document
to basically whenever we’ve put in you know more than 15 or 20 minutes of work
it’s a good idea to save so I’ll just save this as a Ryan save it as a
Photoshop document okay we still have our selection outline
there so I’m just gonna go to select deselect or you can press command D
control D on Windows to deselect okay so now we have we’ve deselected this I’m
gonna rename this layer from background prep to background removed as we’re
about to remove the background from this layer and what I mean by that is we’re
gonna take this which is the gradient of the light pollution and the really
bright sky and we’re gonna remove it from this revealing a lot more detail
we’re gonna use a little-known thing in Photoshop called apply image so if we go
to the image menu up here at the top and choose to apply image by default it applies
the image we’re working on to itself and it multiplies it what we want to do is
we want to use that background image that we just made so I’m going to choose
under source and choose BG PSD and I think it just has one layer so it’s
probably fine to use merge but if you’re seeing something weird
here just you can choose layer one but just has one layer cuz we deleted
the bottom layer so that’s fine for the channel we want to use RGB for the
blending mode we don’t want to multiply we want to go down to subtract because what
we’re trying to do is subtract the background gradient from the image but
leave everything else and by default, it’s subtracting very aggressively
and the reason for that is because the offset is zero but we want to put in a
bit of an offset and this may vary depending on your image so I would just
recommend starting with ten and then basically increasing the offset by ten until you get to a point where basically
If you have a fairly gray image like this it can help to zoom in because you can
see you might have thought oh well the image looked better when he was at an
offset of ten but we were then clipping out a lot of the detail so what we want
to do is we want to keep bringing that number up that offset until we’re not
clipping into any of the actual shadow detail and so you might need to
bring that offset up to 40 or 50 or 60 before you can be sure of that because
we can always bring the black level back down but we don’t want to clip any data
at this point so just make sure that you’re not
clipping anything I think that looks good so if you want to just sort of look
at how my image looks here and try to get yours looking somewhat the same as
mine this is sort of how we want it to look
we’ve removed that gradient but we’re not yet done processing so don’t
worry about it looking perfect yet I mean go ahead and click OK
so now to compare what we just did versus where it was when we first
stretched it I can just turn off and on this layer called background removed and
you can see that was before and that’s after so we’ve flattened out the
background gradient and it looks a lot better already
but it’s not a very dynamic picture yet we haven’t messed around with curves or
saturation or anything like that so the next step is I’m going to duplicate the
layer again pressing command J and I’m going to call this second stretch the nice thing about duplicating
layers like this are if you ever get into a bind and you don’t like the
work that you’ve been doing for the last so many minutes you can always just
delete that layer and try again so I always just after I complete a step in
Photoshop so we went from the unstretched background image this is
when it was still in 32 bits then we stretched it and turned it to 16 bits we
use the apply image trick to remove the background and now the next thing we’re
gonna do is we’re gonna stretch this layer second stretch so let’s go ahead
and click on that and press command L to bring up the levels again and I’m going
to go ahead and bring this over a little bit and bring the black level in
a little bit and you might need to zoom in to really
see what you’re doing but basically, I’m just trying to add contrast to the image
by stretching it out and I’m especially looking at the
Horsehead there and there Ryan Nebula and we’re starting to see the witch head
here too so as you stretch an image you’ll notice that new things appear but
possibly also new issues like we reveal a lot more noise in the background but
that’s okay there’s m78 that’s a cool little nebula
right there okay next thing I’m going to do is I’m going to do a curves
adjustment so I’m going to do image adjustment curves or command M and I’m
going to apply pretty aggressive what’s called an S curve here where you take down in the shadows and
bring up in the mid-tones and this is the same thing we were doing
with levels, it’s just a different way of doing it okay at this point what I want
to do is it’s looking pretty cool but I want to bring out the saturation a
little bit so I’m gonna go to the image so I’m gonna go ahead and say that’s good
for the second stretch let’s duplicate that again call this our saturation
layer let’s go ahead and save the image let’s go ahead and raise the
saturation a bit on this saturation layer I’m gonna go back to my image menu
adjustments I’m going to choose hue/saturation and sometimes you know this
is when you want to zoom in and out a bit to see what this is doing
because sometimes it’s hard to see and I’d also look at different parts of the
an image like you might bring the saturation up like that and think that
looks good on Orion but then when you look up here there it just brings
out so much ugly color noise that and then when you look back you’re like oh
the color noise is right there – so be careful here I’m gonna maybe do 30 plus
30 to the saturation it’s still added a nice boost to Orion there like if I turn
the preview off and on you can see it did boost the saturation of it we can
also if we wanted to get fancy do some targeted saturation boosts so we could
we could mask the nebula and just saturate that part okay I’ll go ahead
and show you how to do that so I just canceled that so let’s say we just
wanted to give a Ryan here a big saturation boost but none of the rest of
the image or let’s say we just really wanted to give the
Horsehead in the flame a saturation boost what we can do is we can add a hue
/ saturation adjustment layer, not the image menu option because that applies
it is directed to the layer well this is going to just apply it as an adjustment
layer that applies to everything below and I’m going to go ahead and bring that
saturation way up like we did before bringing it up to like 50 but then on the
hue/adjustment layer you can notice that has this mask it’s called the layer
mask and we want to just go ahead and fill this with black you can do that if
black is your foreground color you can just press the option or Alt Delete and
that’s going to fill that layer mask with black another way to do it is just
edit fill and we can fill with black that way so you can see since we just
filled that hue/saturation layer with black it took it off so now we’re back
to where we were but what we can do is we can now paint where we want it to
apply so I’m going to choose the paintbrush here I’m going to make it
about 80 or 50 or 80 pixels something like that it looks good I’m gonna make
it’s a nice soft brush so I’m going to use 0% hardness and I’m gonna turn down the
opacity – so I mean it turns the opacity down to 70% and then I’m just
going to paint where I want this to apply and I have to make sure that I’m
painting with white so if black is your foreground color right now just press X
and that will switch them or you can use this little double arrow down here to
switch the foreground and background color I want to make sure I’m painting
with white and then I’m just going to come in here
and I’m going to increase the saturation of my nebulae with the paintbrush and
some people will hate that I’m showing you this because they don’t believe in
this kind of painting on your image but as a quick hacky thing I think it’s fine if you’re doing this for yourself and
you just want it to look how you want it to look then who cares how you do it if
you’re concerned about the ethics of imaging and you think that this
is a bad thing to do then don’t do it anyways what I just did was I increased
the saturation of Orion and the Horsehead in the flame without
increasing the saturation anywhere else maybe I’d also want to do it on these
bright stars I think that looks sort of cool do it on Rigel here yeah okay so
this is looking pretty nice still have a little work to do with making it look
good let me go ahead and add another curves layer I’m just gonna
reset my black point here a little bit something like that okay so the last thing
here if we’re just doing a quick process or not there are two more things
one is if we look at our corners these are bad also the edges have this
weird color modeling so we want to crop this down a bit I’m just gonna grab my
crop tool here put it on unconstrained and I’m just gonna go in from the
corners a little bit keep a Ryan roughly centered do something like that and I’ll just examine it to make sure that
now all the corners look good yeah it’s still a bit of weirdness up there so I
maybe I’ll drop this in a bit more and keep it Ryan roughly Center at all
edge this one in a bit – one thing I’m looking at over here that I don’t want
to crop out is you have they have the witch head nebula faint in right
there so I don’t want to I don’t want to crop that out okay
that looks pretty good though okay in a quick process the probably the last
the thing I would do here is these bright stars all have this sort of magenta into
violet ring around them and I just find it pretty annoying
especially when you’re looking at it at about that scale or something it becomes
pretty noticeable and strategists tracks if you don’t find it objectionable then
you might be done with this this looks pretty good but if you want to work on
those violet hid halos a little bit I’ll show you a technique we can use first
when I do this kind of local adjustment things you want to work on a
fresh new layer but now that we’ve added these adjustment layers
we can’t just duplicate the last layer we’re working on so instead what we have
to do is get to press command option shift e or that would be controlled option
shift e on the windows and what that does is it takes everything that is
visible here and it creates a new layer based on that so this layer will look
exactly like what we had visible for but it’s a fresh new layer we can
start working on the hope that makes sense so I’m just gonna call this removing
violet halos okay and so the way we’re going to do this is we’re gonna select
the violet halos and then change their color and desaturate them a little bit
so to select them I’m gonna use select by a color range which is under the Select
menu and I’ll start by just clicking once on the violet halos and you can see
it already did a little bit here fuzziness starting at 40 that’s fine
then I’m going to switch to the add-to sample mode if you want to do this on
the fly you can just hold down shift while sampling and that will also switch
it to that temporarily but I’m just going to since I want to make sure that
I’m using I’m just gonna go ahead and choose it there and I’m just going to
select a bunch of these halo colors I want to be fairly zoomed in and careful
while you’re doing this not to add anything that’s not what you want okay and then to see how well it’s
selected what I can do is I can turn the selection preview from none to grayscale okay and you can see that it did select
some of our nebula there that’s okay we can fix that in a second but on these
some of these lower stars here you can see didn’t quite complete the halo so
I’m going to go ahead and switch this back to none and grab a little bit more okay I think I went overboard so I’m
gonna go ahead and undo hmm okay I think I messed that up well we’ll just start
over so to start over just go back to your
regular eyedropper here and we’ll start again this is a pretty common thing with a color range tool so you can go
overboard pretty quickly and you might have to start over we might not be able
to get all these faint ones that’s okay though the ones that
are more distracting are the bright violet halos okay let’s see how that
looks like I’m gonna play around with the fuzziness
slider a little bit here zoom out a bit and when we do play around with the
fuzziness slider you can see that sometimes it’s picking up on
color noise in the image and sometimes it’s not I’m okay actually with it
picking up on a bit of color noise because that actually might improve the
image to reduce that a bit but for now, let’s just focus on the halos because
instead of just completely desaturating them like we could with the color noise
I also want to xur to try to just turn them a little bit bluish instead of the
the violet so let’s try that I’m gonna turn down the fuzziness quite a bit
turned it down to 11 okay and now you can see especially if we zoom in that it
has all these little halos selected but it also has some stuff in there Orion
Nebula here that we don’t want to turn so I’m gonna press Q
which brings up this sort of Ruby overlay and you can paint on this with the brush tool I want to paint with a
hundred percent opacity and I’m just going to paint in black where it’s
picked up something that’s not a star halo which is picking up a lot of the
Ryan Nebula and here I don’t want it to do so I’m gonna go ahead and paint that
all in him with black let’s see how it’s done the running man yeah same thing
with the running man, we don’t want it to eat away at the running man okay good enough zoom back out here
Press Q again that just altered the selection now we’re gonna go ahead and
Click on hue/saturation an adjustment layer sorry hue/saturation adjustment
layer and what it did if I press option or alt and click on this layer mask is
it just took our selection and it added that automatically to the layer mask for
this huge / saturation layer and now what we can do is we have a lot of
the flexibility we can open up I’m going to zoom in and we can open up the
properties for this hue/saturation layer and we can play around with this
to try to fix these stars a bit so you can see if I do that it gives it a very
artificial look but we could change the star halo colors the mask isn’t
quite good enough I’d want to blur it if I wanted to do that too much but
what I’m going to do is I’m mostly just going to D saturate and turn down the
the lightness of these bright halos and what that does if I turn this off and on is
it just shrinks the stars and de-emphasizes those halos so if I zoom to sort of a normal level
here and I turn that off and on no sort of hard to see at that level try they’re sort of subtle but I think you can see
it’s you have these bright halos and then we can DM
office eyes them a bit with this trick and you know your violet halos might be
worse than mine it’s all up to how the lens is designed okay I know I
said that was the last thing but this green cast is still bothering me a
little bit so the last thing I’m gonna do is I’m gonna open up a selective color
adjustment layer here and I’m going to go to the blacks and I’m just going to
take out a bit of cyan take out a bit of yellow and a little bit less of the
magenta and increase the black level just a bit oh yeah I think that improved
it a lot you can see here’s before I hope you can see this in the video
there’s a good there’s a go green cast sort of across the background sky
and then just playing around with selective color blacks taking the sine
and yellow down to negative five the magenta down to negative three and the
black plus six I think that’s a big improvement on the sky color okay so the
focus on this picture I think is a Ryan Nebula and the running
man we captured that pretty well we also have the nice bright star Rigel here we
have a little bit of the witch head you can see her nose and mouth a little bit
and chin zooming around here we have the nice
belt stars and we have the horse head and flame so we’ve captured a bunch of
nice nebulas I hope that you have learned something in this tutorial last
the thing I’m going to do here is just to save this for the web so I go to file save
for web in newer versions of Photoshop, I believe they’ve moved this to the export
command maybe just look around for it it might say save for web legacy but it’s a
nice way to save off your extra images because it just has a lot of
options in a nice big box I just really prefer this and you can
you can change things very quickly you always have that convert to RGB option
it has a nice estimate of how big the image will be lets you scroll around and
see when you change for instance the quality and what its gonna do to the image
if it’s gonna soften it too much but I’m just gonna save off a 100-quality JPEG
oh and then another thing you can do down here is you can change the size so
let’s say I didn’t like how this looked at 100% so I’m gonna change the size to
3000 pixels wide see how that looks now yeah maybe I liked the look of that
better it gives you these different options for how it’s going to resize it
for Astra images I would always recommend bilinear I wouldn’t use it by
cubic or nearest-neighbor not nearest-neighbor
but I think these options by linear is your best bet as the resampling
method when you’re shrinking an image I should point out I I would never
recommend blowing up an image making it bigger and
larger yet so if you’re shrinking an image used by linear, okay this looks
good let’s just fit it in view to make sure I still like how that looks
yep that looks cool so let’s go ahead and save it Orion dot JPEG I’ll save it to the
desktop here and take a look in preview make that full screen yeah I think that
looks nice and gives you a sense of most of the constellation maybe I could
have framed it better vertically and gotten Betelgeuse in there oh well next
time so I’m happy with this I hope that you’ve learned something about taking
short exposures and showing that you can bring out several nebulae in even
wide field exposures with the right techniques I hope that you subscribe to
my channel and if you wanted to keep seeing videos like this one you can also
support me on Patreon.

Well till next time, Clear skies! This is Nico Carver
from nebulaphotos.com.